

Not long ago I posted about how I turned a pair of long trousers into shorts. Now, not one to throw away any scrap of fabric I got to musing on how to use up the unwanted legs...

I am going to a wedding soon and I want to made a little clutch bag to match my outfit. I have a very beautiful piece of fuchsia* silk that I will use. Thing is, I'm a bit scared of cutting into that beautiful piece of silk.
So I had the idea of making a 'muslin', a practice bag, using the fabric left over from the pants-to-shorts adventure.
I looked high and low for a pattern that I liked and eventually settled on this great and simple clutch pattern at the Purl Bee (currently one of my favourite crafting websites packed full of gorgeous patterns).
I will not attempt a tutorial for this bag because there is no way I could do a better job than the Purl Bee's, but I will note my thoughts as this project progressed.
What I learnt:
- I love iron-on interfacing. It's great for adding structure to something like this that needs to exhibit a bit of personality. I found a very useful resource at the Sewing Directory which explains how to choose and use interfacing properly.
- It's fun to pick out a colour from plaid and use it as the main stitching colour.
- I found a fascinating glossary of fabric patterns (I wanted to check that plaid is what I thought it is!)
- The current size is a little narrower than I need, my wallet is quite wide and doesn't fit inside. I need another couple of inches width.

I think the most important thing I learnt about was how to deal with magnetic clasps. Inserting a magnetic clasp is quite simple (explained at Purl Bee) and looks very professional.

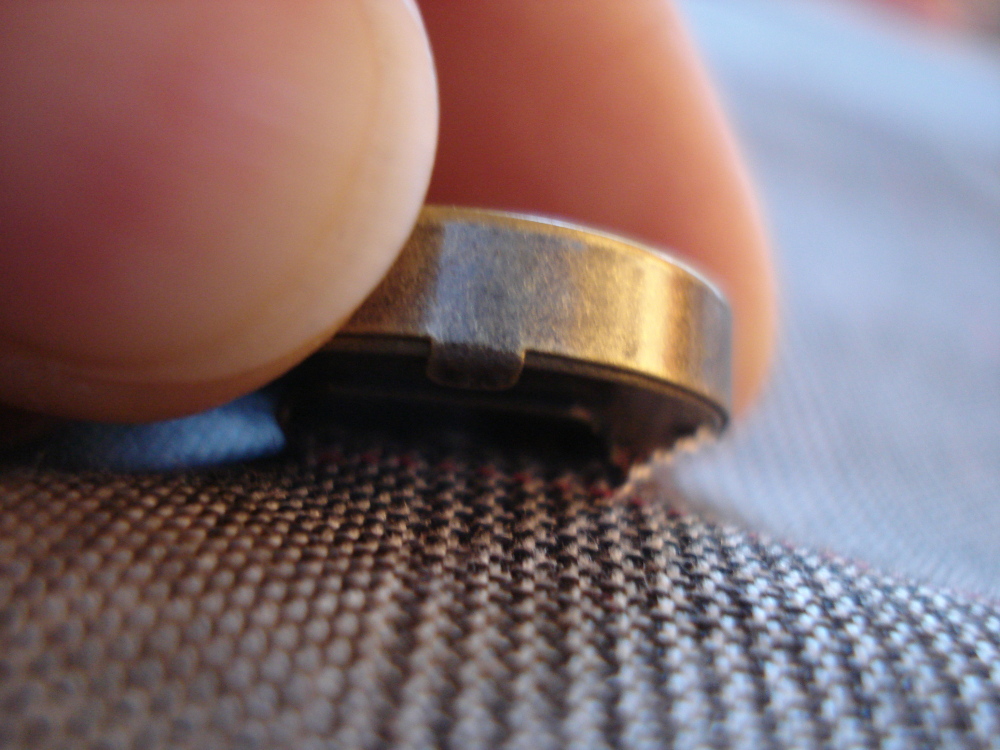
However, I had some problems with the clasp once the clutch was finished. The magnet is too strong for my fabric! I risk ripping the material every time I try to open the bag. My clasp didn't come with a metal backing plate like you see in the Purl Bee pattern and this might have something to do with the problem.
The picture below shows how the clasp pulls on the material. I had anticipated this and put an extra layer of interfacing over this spot on the wrong side of the fabric, but it isn't enough to protect it. I am not sure how to rectify this now that the bag is finished. Any ideas?
Based on this experience I have decided not to use the same type of clasp for my silk bag. I believe that the rough silk I have is a bit too delicate and that these clasps would be much better suited to a heavy material like denim or suede. I will do a little more research. The wedding is less than two weeks away though, so I had better get a move on!

*I have always thought that fuchsia was spelt 'fuschia'. I am wrong according to Wikipedia and The British Fuchsia Society. As I'm pretty sure they know better than me, I will go with their spelling. But I remain suspicious, despite Google's spell check agreeing with them. How do you spell it?
PS: I'll probably be linking this post up to a lot of lovely craft linky parties, to see which ones view the party buttons on the What I'm... page.
PPS: Have you discovered the Etsy Stock Take yet? Check out the tab at the top of the page, you can find great handmade items, jewellery, bags, clothes etc. for sale. Need a meaningful gift? You'll find one at Etsy...


