<a href="http://www.ExpatWomen.com/">Expat Women</a><br>
Ohhh, exciting! :)
Friday, 3 February 2012


A bit more handcream.

I did one batch with my Sis-in-law last week and then another batch today. I now know a bit more about handcream-making (click here for the original post and recipe).
Batch 2
- To solve the not so perfect and professional (post-stirring) look we tried adding the lavender essential oil to the little containers and pouring the hot mixture on top. Then a quick mix while everything is still quite liquid. This way it cooled down with a smooth top. The downside is that some of the lavender oil probably still evaporates (as essential oil does when too hot), but hopefully not much. We can report that the cream still smelt lavenderish when it was finished!
- To try and retain some of that lavenderishness we closed the lids of the pots before the cream was cool. This wasn't a good idea as we ended up with some liquid separation. I think it was the aloe vera gel which was also added while the mix was hot. Perhaps re-melting and mixing again would help.
Batch 3


- I couldn't be bothered with the in-the-oven sterilisation process for the glass today. But as I was also using some smaller plastic pots, I used a bigger saucepan and just bunged everything in the hot water letting it boil for a minute or two to get them really clean. Update: Do not sterilise plastic pots in this way! The heat warps them, although impossible to see, when you try to close them the threads don't line up anymore. Very disappointed, I ruined them. Don't make the same mistake!
- Again I mixed in the aloe vera gel when my mixture was hot. This time I let the cream cool with the jars open. There was still a little separation, but much less than batch 2. I think it's a good idea to add less aloe (so far I've put in a generous splash, might try a stingy one next time!) or to omit it unless I add it and mix it in when the mixture is cooler...but then I don't get the pretty smooth top...Mmmmm...
- I was hoping to make some coco lip balm today, but my new glass pots are quite big and swallowed up all my mixture! I will try next time (see updates below!).
- I made another batch, this time using 20 drops of Orange essential oil in about 100g of cream (I mixed it directly in the jar). Smells like chocolate orange!
- And I had a tiny bit of the plain mixture left over so I melted in some coconut oil and then tipped it into an emptied out old vaseline jar. Mmmm... It's more of a vaseline type texture because of the extra oil: Please welcome my new Coconut Lip Salve :)

Thursday, 2 February 2012
How to: Handmade Man Apron.
 |
| Make me! |
Handmade Man Apron in 10 Easy Steps.
This is my response to the January monthly make and a lovely sew one thing a month sew-a-long which I have temporarily lost in blog land, will update when I find it.
A nice easy project for January to ease me into things. Very customisable too.
If you want to make one read on.
If I'm reading these notes while making another one some time in the future - hello me!
You will need:
- A loved apron (already in existence).
- Fabric (Cotton is good cos it's hard-waring and washes well).
- Sewing stuff -pins -scissors -sewing machine -thread -iron
 |
| 1. |
1. Fold your fabric and fold your apron in half longways. Lay one on top of the other. I laid my fabric out with the selvedge edge at the top as it was nice and fluffy and also because then I wouldn't have to hem that bit. (Please do not forget to lay the fold of the fabric under the fold of the apron - very important!).
2. Measure any extra length (if you want it). I added about 20cm to the bottom. I also decided to make a curve at the top sides instead of the square shape of my apron.
 |
| 3. |
3. Cut around your apron incorporating your adjustments. Unfold and admire.
 |
| 4. |
 |
| Tip! |
5. Make 3 tubes, for the 2 ties and the round the neck bit.
 |
| 6. |
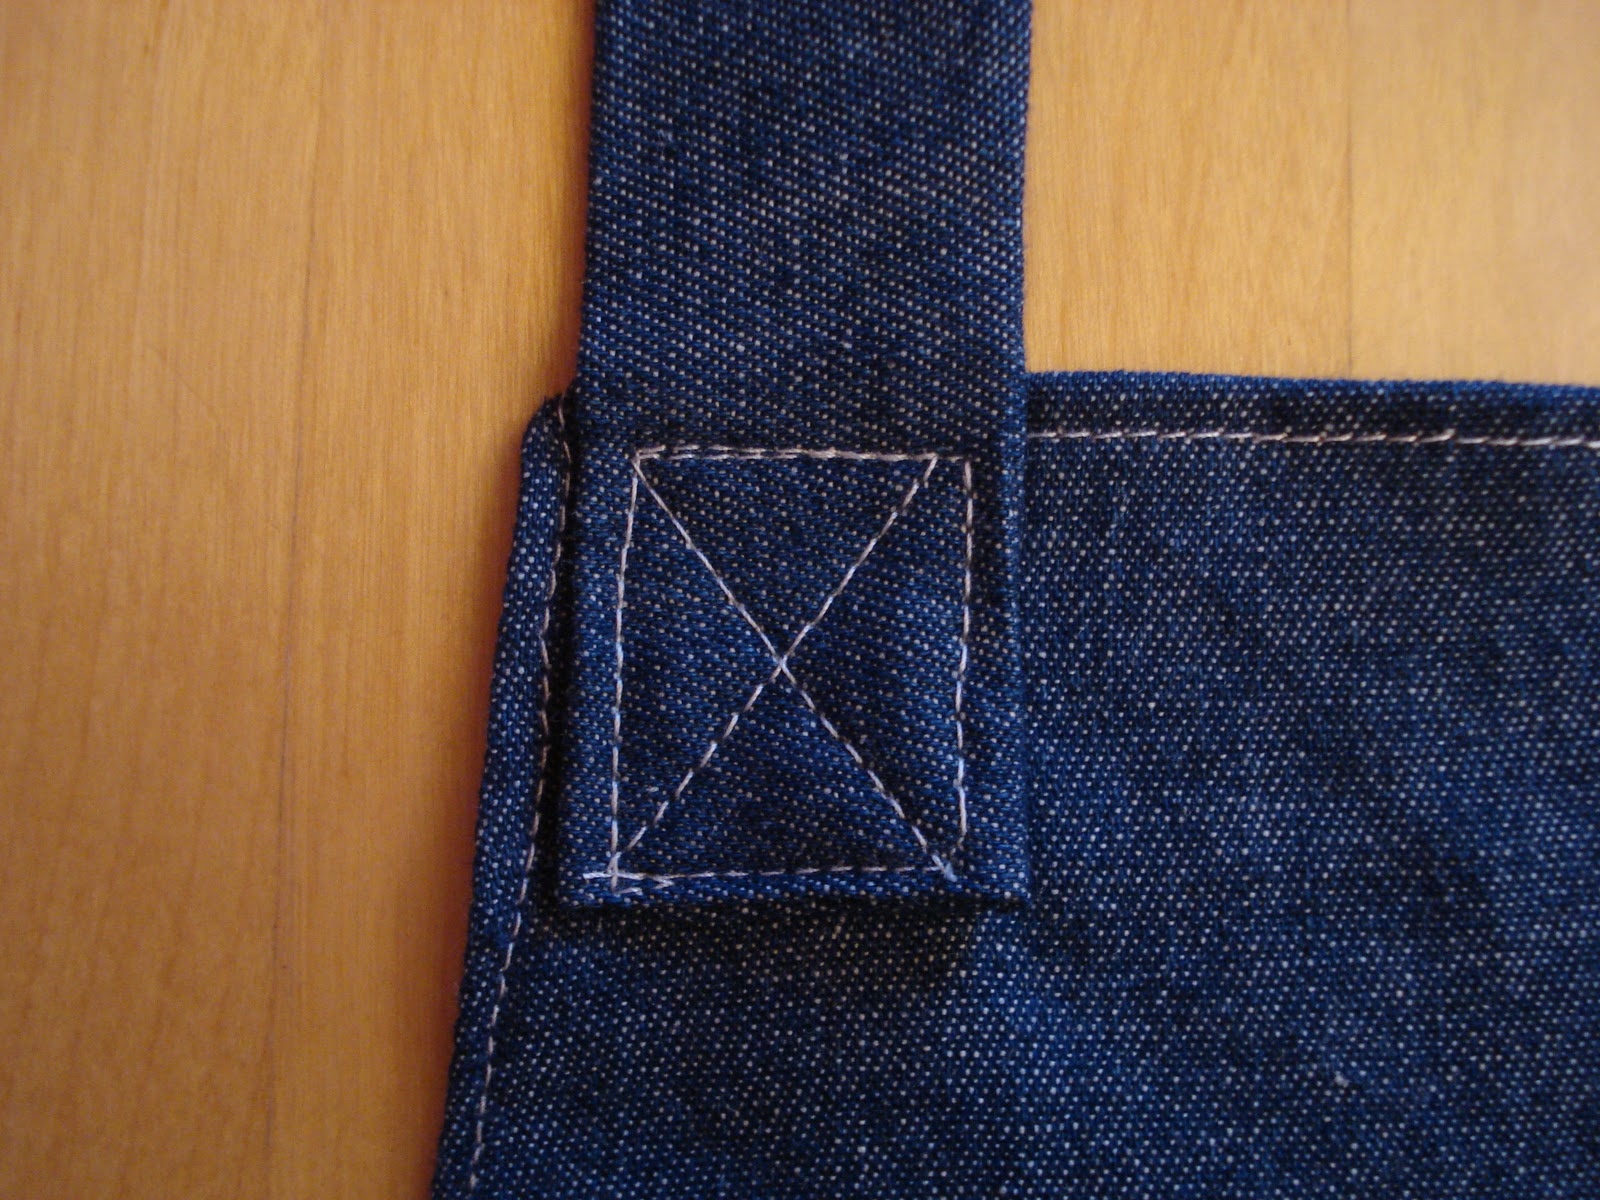
6. Fold in untidy ends of the ties and pin them into place.
 |
| 7. |
7. Sew them on.
8. Do the same with the round the neck thingy, measuring it up using your old faithful apron.
 |
| 9a. |
 |
| 9b. |
9. Pretty it up a little (only a little cos it is a man apron). If you are making a girl apron go to town!
 |
| 10. |
10. Get a man to model it for you!
If you do make one please leave me a link to a picture so I can see it, would love to share!
What are you sewing these days?
PS. You might have noticed that my blog changed colour about 5 times today... I'm desperate to improve the background style, but I'm afraid it is a work in progress! Hang on in there with me :)
Subscribe to:
Posts (Atom)
